Creating Web Services with .NET SDK
Summary
The purpose of this chapter is to create and test a Web Service manually without
the help of VisualStudio.NET.
- Install VisualStudio.NET or the .NET SDK
- Create a virtual directory in IIS that maps to a test directory on your HD
(accept all IIS defaults). In this example, the virtual directory is called chapter2
and the test directory is called Chapter2.
- Code the following Web Service into a .asmx
file and copy the file into the directory pointed to by the virtual directory
(created in the step above.) In this example, the file is called pmcalc.asmx.
<!-- pmcalc.asmx -->
<%@ WebService Language="C#" Class="pmcalc" %>
using System;
using System.Web.Services;
[WebService()]
public class pmcalc : WebService
{
[WebMethod()]
public int Square( int nNum ) { return nNum * nNum; }
}
- Creating a Web Service is analogous to creating a COM component. A COM
component has no graphical user interface and most importantly, does nothing
by itself. It can be brought to life only by a calling application.
To test these components, a simple little client called a test harness is
often written to exercise the methods of a COM component. The same principle
of using a test harness applies to Web Services, however, ASP.NET Web
Services already supplies a built-in test harness. Its file name is DefaultWSDLHelpGenerator.aspx
and it appears automatically when you use the browser to request the Web
Service.
When you browse to pmcalc, you will see the following web page
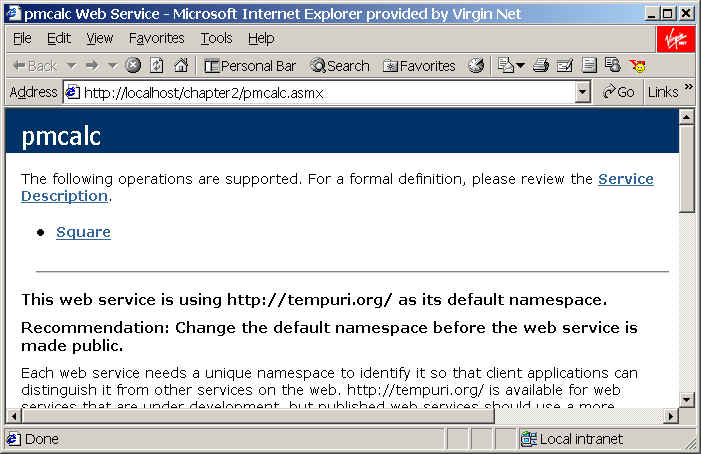
- Clicking on the Service Description link gives the WSDL document that
describes your Web Service. WSDL is an XML document and it tells consumers
of the Web Service what methods are available and what parameters to send
and receive:

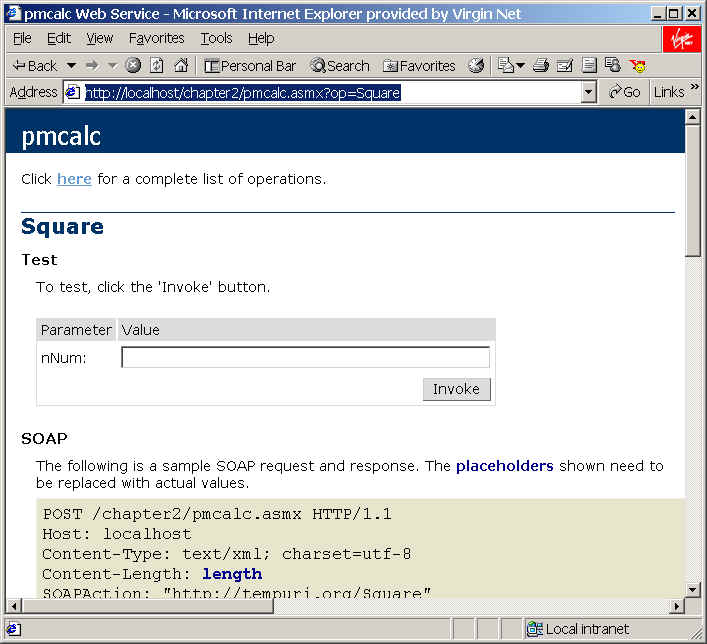
- The greatest value of the Service Help Page is that it allows you to test
each and every method exposed by the Web Service. And it provides sample
code to explain how to call the Web Service method using three methods:
SOAP, HTTP-GET, and HTTP-POST:
The WSDL file is used by all applications that want to communicate with your
Web Service to discover what methods and properties are available, the
parameters and their data type, and the types of returned values.
Methods of Creating the WSDL File
A WSDL file can be created in two ways:
- Create it by hand
In this case, you use a text editor and the latest version of the WSDL
specification to write it by hand. You only use this option if you have lots
of free time and happen to enjoy pain (in which case you might be in the
wrong profession!)
- Copy the results of the Service Help Page and save into a file with a .wsdl
extension
Creating a WSDL file by hand is completely unnecessary because it is time
consuming, because of the specification's complexity, and because there are
utilities that generate it perfectly and instantly.
Many times, having a separate .wsdl file is
not necessary; when your consumers are ready to discover your Web Service's
methods and properties, they need only access the URI of your Web Service,
adding the string ?WSDL at the end. For
example, http://www.diranieh.com/MyWebService.asmx?wsdl.
This approach has the advantage of ensuring that a WSDL file is always in synch
with the Web Service.
Examining the Generated WSDL File
The following is a high-level overview of WSDL which is discussed further in
Understanding WSDL. There are five distinct sections in WSDL that are
enveloped by a <definitions> tag:
- <types>
Defines the data types and data structures that will be used by the Web
Service. This section can be thought of as the Web Service's type library.
- <message>
Defines the programmatic interfaces for each method of calling a Web
Service. There are three ways of interacting with a Web Service for both a Request (In) and a Response
(Out):
- SOAP: The de facto method of Web
Service calls.
- HTTP-GET: sending parameters in
a Web page's URL query string.
- HTTP-POST: Sending parameters
in a Web page form.
Therefore, this section has
six <message> tags. Each of the <message>
tags refer to the types defined in the <types>
section to bind the data types to each of the three methods of calling the
Web Service.
- <portType>
This section ties the Request (In) and a Response (Out) messages for a given
calling method (SOAP, HTTP-GET, HTTP-POST).
If your consumers will use SOAP, for example, they need to know how to
create a SOAP request and receive a SOAP response. Note that this section refers
to values defined in the <message>
section
- <binding>
This section is used differently by each calling method. Basically, it
assigns known standards (HTTP or SOAP) to each <portType>.
- <service>
This section contains all the different bindings that are supported for this
Web Service. Most important, it provides the exact URIs for each calling
method.